Caching Fly.io Apps with Cloudflare
January 22, 2022
Services like Fly.io and Render have generous free tiers for compute and bandwidth, but if you're trying to scale a side project for free, sticking Cloudflare in front of your API can dramatically reduce billable usage and improve performance.
I'll go over proxying your Fly.io application through Cloudflare, and then some gotchas regarding caching headers & Cloudflare settings.
Setup Node API on Fly.io
First step is simple -- just follow the Fly.io tutorial to deploy a Node application.
You'll end up with a URL that looks something like this:
https://crazy-cats-4499.fly.dev/
Setup DNS to Route Subdomain to Fly.io
I'm no expert on DNS entries or SSL certificates, but I was able to find my way by reading through the forums. This post in particular was really helpful.
-
Add your domain to Cloudflare. This will take a while since you'll need to wait for your domain's nameservers to propagate. Full tutorial here
-
Set Cloudflare SSL/TLS encryption mode to "Full". This means it will encrypt traffic between itself and the origin/backend (in this case Fly.io).
-
Go to the Fly.io dashboard and find your app, e.g.
https://fly.io/apps/crazy-cats-4499 -
Navigate to "Certificates" and click "Add Certificate".
-
Enter a hostname for the certificate. This is a "single-name" certificate and you can read more about it here.
In my case, I just wanted to proxy a subdomain to Fly.io, so I entered my subdomain, e.g.
yesiam.crazyaboutcats.com
For more flexibility, you could use a wilcard certificate, e.g. *.crazyaboutcats.com.
- Follow the Fly.io instructions to add one or more CNAME records to your DNS settings in Cloudflare.

Make sure the "Proxy status" option is set to "DNS only": grey, not orange!
The _acme-challenge CNAME is required for wildcard certificates but optional for simple subdomain ones.
- Back in Fly.io dashboard, try clicking "Check Again" every few minutes until you see the certificates show up. This can take a while, especially if you're using a wildcard certificate. Be patient and go grab a cup of coffee! (could take 20 minutes)
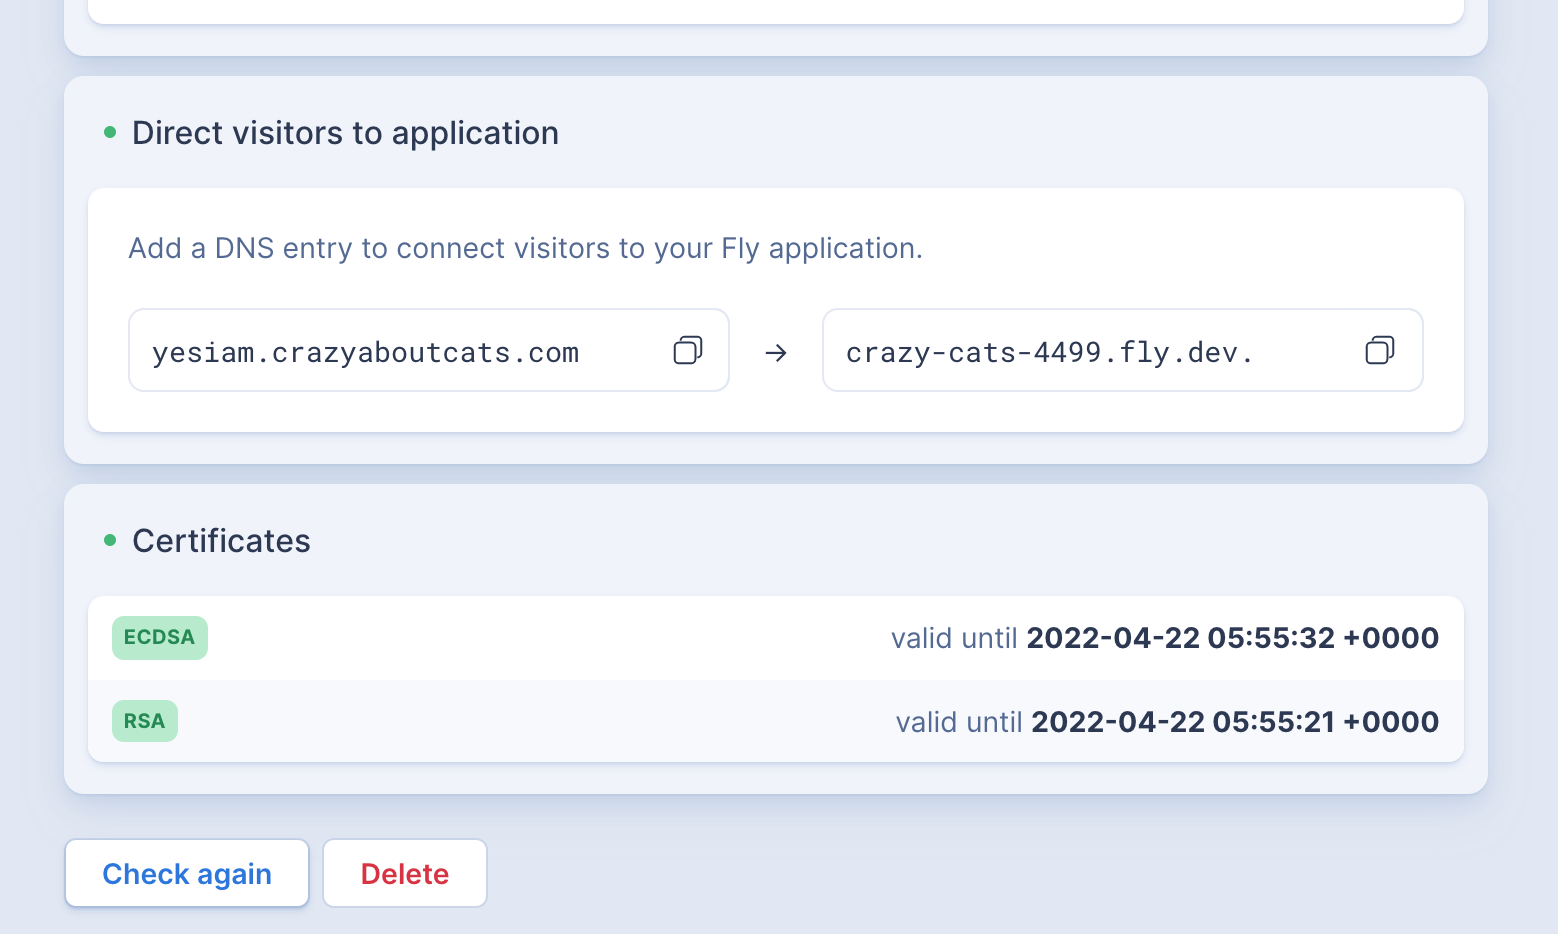
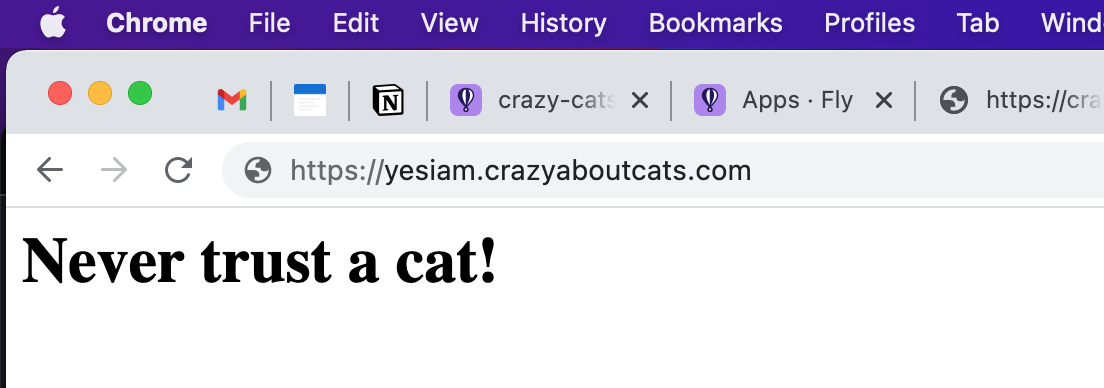
- Once these certificates show up, you should be able to visit your subdomain and see the response from Fly.io.
- Once you've verified it's working, go back to the DNS entry in Cloudflare and turn on proxying (grey -> orange).
You can verify that Cloudflare is proxying your application by checking the server response header. It should be set to "cloudflare", not "Fly/...".
Cloudflare Caching
Once Cloudflare is proxying your application, you can set HTTP headers and/or Page Rules to configure caching. A couple gotchas that I've had to wrap my head around:
-
By default, Cloudflare only caches URLs with certain file extensions (e.g.
.css) AND theCache-Control: public, max-age={integer}header must be set. If you want your/rest/api/endpointto be cached, you'll need to add a Page Rule withCache Level = Cache Everything, since it's missing a file extension. -
Cloudflare will cache your content for a minimum of 14400s (4 hours) by default (or longer if a larger value is set in
max-age). You can reduce this to 2 hours in the free tier by setting an "Edge Cache TTL" Page Rule. But you're better off just setting a caching header that specifically targets the CDN (not the browser). Here's some example headers that tell Cloudflare to only cache your endpoint for 1 minute:Cache-Control: s-maxage=60CDN-Cache-Control: max-age=60Cloudflare-CDN-Cache-Control: max-age=60
Hope you found this helpful! If I missed anything, don't hesitate to let me know in the comments.
While you're here, check out my latest project: a podcast app that skips ads!
Comments are welcome!