How to Accept Payments in Your Play Store TWA
July 19, 2021
Distributing your PWA as a TWA in the Google Play Store is relatively painless, but transitioning for a single payment provider (e.g. Stripe) to supporting Play Store billing in your TWA can be tricky. Here are a few significant differences:
-
Price localization: In Stripe, you choose what currencies you accept and display only those currencies to your users. In the Play Store, USD prices are automatically converted to the user's preferred currency and you need to be able to display arbitrary currencies in your UI.
-
New browser APIs: Instead of Stripe elements or checkout, you'll be using the Digital Goods API and the Payment Request API to show a native payment prompt to your users and track purchases.
-
Keeping track of users: The Play Store handles purchases by Google Play accounts and does not expose the email of the paying user to you. This results in some tricky situations we'll get into later.
High Level Overview
At a high level, here's how the Play Store payment flow works on a TWA:
On each page load:
- Detect TWA session
- Ask Digital Goods API what the prices are and display them in the UI
- Ask Digital Goods API whether the current Google Play user is subscribed (optional)
When a user is ready to pay:
- Use Payment Request API to show native browser prompt and get token
- Send token to your backend API to validate & record payment
- Acknowledge purchase using Digital Goods API
Detect TWA session
Detecting that the user is using your TWA and needs to pay with Play Store billing instead of Stripe is trivial.
Get Prices from Digital Goods API
First off, enter your USD prices for one-time purchases or subscriptions in the Google Play console. You can manually specify prices in other currencies, or just let the Play Store do the currency conversions automatically.
The price objects you'll be working with look something like this:
/**
 * Play Store prices are used by TWA
 * @typedef GooglePlayPrice
 * @property {string} id - Plny Storen-us - e.g. 'es' or 'es-mx' for English
 * @property {string} currency - e.g. "USD"
 * @property {string} value - e.g. "2.99"
 */

const priceObjects = {
  monthly: {
    id: 'plus_tier_monthly_2_99',
    currency: 'USD',
    value: '2.99',
  },
  yearly: {
    id: 'plus_tier_yearly_24_99',
    value: '2',
  },
];
Notice how above I've hard-coded the default USD currency and value. I wouldn't have to, but it's good to have a fallback in case the Digital Goods API request fails (e.g. user is offline).
Next, we'll update these prices to match the user's preferred currency:
async function updatePlayStorePrices(monthlyPrice, yearlyPrice) {
  // Connect to Digital Goods service
  const service = await window.getDigitalGoodsService('https://play.google.com/billing');

  // Request latest price data from Play Store
  const [
    monthlyPriceDetails,
    yearlyPriceDetails
  ] = await service.getDetails([monthlyPrice.id, yearlyPrice.id]))

  // Update currency & value to match user's preferred currency
  Object.assign(monthlyPrice, {
    currency: monthlyPriceDetails.price.currency,
    value: monthlyPriceDetails.price.value,
  });
  Object.assign(yearlyPrice, {
    currency: yearlyPriceDetails.price.currency,
    value: yearlyPriceDetails.price.value,
  });
}

try {
  await updatePlayStorePrices(priceObjects.monthly, priceObjects.yearly)
} catch (err) {
  // Log a warning in your error reporting software
  reportError(err, 'Failed to update Play Store prices. Falling back to USD.');
}
Rendering Arbitrary Currencies in UI
Given that a price's currency and value will change based on the user's preferred payment method, it's important that your UI is flexible enough to render an arbitrary price string. The Intl.NumberFormat browser method makes it easy to format any currency in any language:
/**
* Format price for display in UI
* @param {GooglePlayPrice} price
* @param {string} langId - e.g. 'en' or 'en-us' for English
* @return {string}
*/
export function formatPrice(price, langId) {
const { value, currency } = price;
const numberFormat = new Intl.NumberFormat([langId], {
style: 'currency',
currency,
currencyDisplay: 'symbol',
});
return numberFormat.format(value);
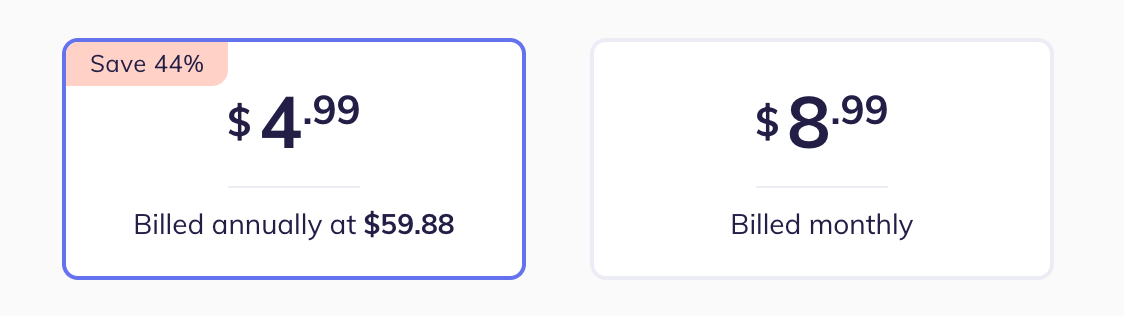
}For the befunky.com/pricing page, we do some additional formatting to emphasize the major unit (dollars) of the price over the minor unit (cents). Getting this right for all language/currency combinations is nigh impossible, but we are able to do it for some common scenarios.
/**
 * Template for rendering price
 * @param {GooglePlayPrice} price
 * @param {string} langId - e.g. 'en' or 'en-us' for English
 * @return {string}
 */
export function priceTemplate(priceObject, languageId) {
  const formattedPrice = formatPrice(priceObject, languageId);

  // Grab the symbol & suffix from the formatted price
  const nonNumericParts = formattedPrice.split(/\d/);
  const prefix = nonNumericParts[0];
  const suffix = nonNumericParts[nonNumericParts.length - 1];

  // Grab part of price that is numbers
  let numericPrice = formattedPrice.slice(prefix.length);
  numericPrice = numericPrice.slice(0, numericPrice.length - suffix.length);

  // If there's decimal values at the end, make them small
  const pricePartsMatch = numericPrice.match(/^(.+)([.,])(\d\d)$/);
  if (pricePartsMatch) {
      const [, majorAmount, delimiter, minorAmount] = pricePartsMatch;
      return template({ prefix, majorAmount, minorAmount, suffix, delimiter });
  }

  // Decimal value not found, just render the full price string
  return template({ prefix, majorAmount: numericPrice, suffix });

  /**
    * Template for displaying large dollars beside small cents
    * @param {string} largeAmount - dollars
    * @param {string} [smallAmount] - cents
    * @param {string} [prefix] - $
    * @param {string} [suffix] - suffix to indicate currency, e.g MXN in "$100 MXN"
    * @param {string} [delimiter] - between dollars & cents
    * @return {TemplateResult}
    */
  function template(prefix, largeAmount, smallAmount, suffix, delimiter = '.') {
    return html`
      ${prefix ? html`<span class="small-text">${prefix}</span>` : ''}
      <span class="large-amount">${largeAmount}</span>
      ${smallAmount ? html`<span class="small-amount">${delimiter}${smallAmount}</span>` : ''}
      ${suffix ? html`<span class="small-text">${suffix}</span>` : ''}
    `;
  }
}
Handling Already-Subscribed Google Play Users
When using your own payment processor (e.g. Stripe), your user database is the source of truth concerning what users have active subscriptions.
In contrast, the Play Store manages subscribing and unsubscribing, and just exposes the ID of the subscription to your backend (via a webhook or API request). You don't actually know what the Google Play user's name or email is. You just know what account they were logged-in to in your application when they subscribed.
- From your perspective, a particular user account (a@a.com) is subscribed and associated with a Play Store subscription ID.
- From the Play Store's perspective, all devices with a particular Google Play account (b@b.com) are subscribed to your app.
This leads to a disconnect whenever a user is on a device profile with the subscribed Google Play account (b@b.com) but not logged-in to the associated user account on your app. For instance:
-
They log out of the
a@a.comaccount in the TWA and let a friend use their device. The friend logs into the app asc@c.com, and when they try to upgrade, the Play Store says "you've already subscribed". -
Their
a@a.comsession expires. They're confused why they can no longer access premium features, since they know the have an active Play Store subscription for your app.
In both cases, you'll need to develop a flow that acknowledges that the Google Play user on this device is subscribed, but that they'll need to login to your app with the associated account (e.g. a@a.com) to use premium features.
Here's a basic outline of a solution:
export async function handlePlayStoreUser(currentAppUser) {
  // Current app user is already subscribed, no need to bother them
  if (currentAppUser.isSubscribed) return;

  // Connect to Digital Goods service
  const service = await window.getDigitalGoodsService('https://play.google.com/billing');

  // Get purchases made by current Google Play account
  const purchases = await service.listPurchases();
  if (purchases.length === 0) return;

  // Get app user associated with these purchases from your backend
  const subscribedUser = await requestApi('get-user-for-play-store-purchases', purchases);

  if (subscribedUser && subscribedUser.email !== currentAppUser.email) {
    // Prompt user to login with the email address of the upgraded account associated
    // with their active Play Store subscription
    showDialog(`Welcome back! Please login to this app as ${subscribedUser.email} to use premium features.`);
  }
}
Alternatively, you could let any account on the device use premium features, but that would probably involve a much deeper refactor of your app's logic.
Handling Payments
This part is actually pretty straightforward!
-
Use PaymentRequest API to display a native payment prompt to your user.
-
Send token for the approved payment to your backend.
-
On the backend, validate token using Google Play API and upgrade the associated user account.
-
Acknowledge the payment using the Digital Goods API.
async function processPayment(priceId) {

  // Build payment request
  const paymentMethod = [
    {
      supportedMethods: 'https://play.google.com/billing',
      data: { sku: priceId },
    },
  ];

  // 1. Open native dialog to prompt user to pay
  let token;
  try {
    paymentResponse = await new PaymentRequest(paymentMethod).show();
    token = paymentResponse.details.token;

  } catch (error) {
    if (error.message.includes('was cancelled')) {
        // User dismissed native dialog
        logWarning('User chose not to subscribe:', error);
    } else {
        // Report unexpected error
        reportError(error, 'PaymentRequest.show() failed');
    }
    return;
  }

  // 2. Send token to our API to validate subscription & update database
  let validationResponse;
  try {
      // 3. Validate on backend using Google Play Developer API
      // https://developers.google.com/android-publisher/api-ref/rest/v3/purchases.subscriptions/get
      validationResponse = await requestAPI('validate-play-store-payment', { priceId, token });

      if (!validationResponse.isValid) throw new Error('Failed to validate token');

  } catch (error) {
    // Report unexpected error
    reportError(error, validationResponse);

    // Show payment failed UI
    await paymentResponse.complete('fail');
    return;
  }

  // 4. Acknowledge purchase with Digital Goods API. Otherwise, user will get refund in 3 days.
  try {
    const service = await getDigitalGoodsServiceOnce();
    const response = await service.acknowledge(token, 'onetime');

  } catch (error) {
    // Report unexpected error
    reportError(error, 'Failed to acknowledge purchase');

    // Show payment failed UI
    await paymentResponse.complete('fail');
    return;
  }

  // Thank user for purchasing a subscription!
  // ...
}
Feel free to leave a comment if any of this doesn't make sense or could be improved!
I'm in the process of building out this flow for BeFunky, and will update this article as our approach evolves over time.
While you're here, check out my latest project: a podcast app that skips ads!
Comments are welcome!