Setting up Custom Authorization in Ember-CLI using Google oAuth2 for the Initial Login
June 15, 2015
I've found it handy in Ember-CLI apps to use Google logins for initial authentication (that way I don't have to store passwords). The question is how to transform a Google login into a session that can be used to query user-specific resources from my own server (not just Google's APIs). Here's a high level view of the process:
- User logs in to their Google account, and authorizes Ember app. In this process the app receives a Google token.
- App sends Google token to the node server in response for a new token. The server validates the Google token and then uses it to get user info from Google. It then creates a new custom token containing a user id, which it sends to the app.
- App uses it's new custom token in all further requests to the server. Right before this token expires, it will be refreshed.
In this process, token refers to a JSON web token. We'll be using the following open-source projects to build a basic app (for the finished product, see my GitHub repo).
Ember Client:
- Ember-Cli
- Ember Simple Auth and Ember CLI Simple Auth Token extension
- Torii Google Oauth2 Bearer provider
Node Server:
- Express for creating REST API routes
- jsonwebtoken and express-jwt for encoding and decoding JSON web tokens
- request for talking with Google's APIs
- bodyParser for extracting the body (data) from the app's requests.
Step 1: Setup Ember-CLI app structure
Create a simple folder structure:
basic-auth-demo
    ember-client
    node-server
Instead of actually making an "ember-client" folder, just run:
ember new ember-clientwithin the basic-auth-demo folder. Then we'll set up the following route structure:
ember g route s
ember g route s/notes
The idea is that any subroute of s (for "secure") will be protected from public access by a Google login. Ember Simple Auth has some mixins that make this a synch. Initially, I'll set up some really basic templates to keep track of our nested routes.
<h2 id="title">Welcome to Ember.js</h2>
<a >Logout</a>
<a >Login</a>
<!-- s.hbs template -->
<hr>This is a secure route.<hr>
<!-- s/notes.hbs route -->
<p>A list of secure notes...</p>
Then if you run ember s and navigate to localhost:4200/s/notes you should see something like this:

Step 2: Setup node server to return tokens
In the node-server folder, create a server.js file.
// express framework for routing
var express = require('express')

// create and validate json web tokens
var createJWT = require('jsonwebtoken')
var validateJWT = require('express-jwt')
Then setup a node project with npm init (it creates a package.json to track dependencies--you can just press Enter at the prompts)
cd node-server
npm init
and install the modules we required in server.js.
npm install express --save
npm install jsonwebtoken --save
npm install express-jwt --save
Great, now you can try to run your node server!
node serverIf nothing happened, that's a good thing. It means there were no errors. Now let's actually set up the node server that listens on port 4500. Add these lines to server.js
// startup and listen on port 4500
var app = express()
app.listen('4500')

// setup HTTP headers
app.use(function (req, res, next) {
  res.setHeader('Access-Control-Allow-Origin', 'http://localhost:4200')
  res.header(
    'Access-Control-Allow-Headers',
    'Origin, X-Requested-With, Content-Type, Accept, Authorization'
  )
  res.header('Access-Control-Allow-Methods', 'POST, GET, PUT, DELETE, OPTIONS')
  res.header('Content-Type', 'application/json')
  next()
})

// respond with "yolo" to a GET request to the root (localhost:4500)
app.get('/', function (req, res) {
  res.send('yolo')
})
This time when your run node server it should pause (until you hit Ctrl-C) b/c it's listening to port 4500. Try going to localhost:4500 in your browser and you should see "yolo".
We can use this same syntax to respond to Ember when it requests a json web token with a POST request. Add the following to server.js to serve up a token when a POST request is sent to localhost:4500/get-token.
// respond w/ token to POST request to /get-token
app.post('/get-token', function (req, res) {
var token = createJWT.sign(
// payload
{ currentUserId: 1 },
// secret
'09htfahpkc0qyw4ukrtag0gy20ktarpkcasht',
// options
{ expiresInMinutes: 10 }
)
res.send({ token: token })
console.log('\tsent token')
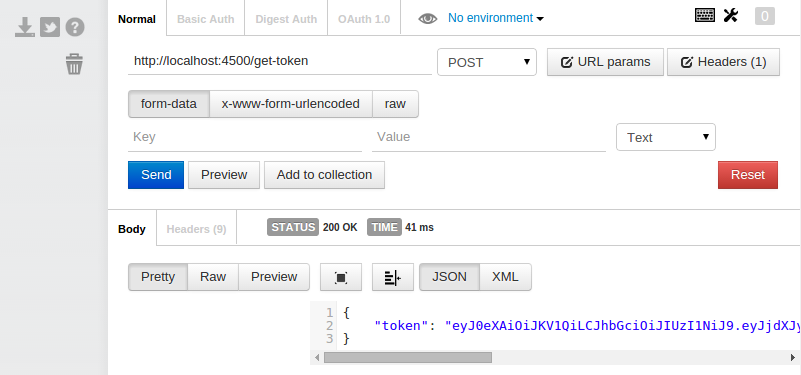
})Now, use a browser extension like Postman for Chrome to send a POST request to localhost:4500/get-token. You'll need to restart the server (ctrl-c, then node server again) first to incorporate the new code or you'll get a "Cannot POST /get-token" error.
Just for fun: to get a good grasp of what the token actually stores, paste it into the jwt.io.
Step 3: Hook up Ember Simple Auth with node server
Install Ember Simple Auth and its token-based extension.
cd ../ember-client
ember install ember-cli-simple-auth
ember install ember-cli-simple-auth-token
Tip: I generally find it best to open up two terminal tabs open so I can have node server running while I work in Ember Then let's create an adapter so Ember knows where it's API server is:
ember g adapter application// application.js adapter
import DS from 'ember-data'
export default DS.RESTAdapter.extend({
host: 'http://localhost:4500',
})And setup the authentication addons by adding the following properties to ENV in config/environment.js:
contentSecurityPolicy: {
  'connect-src': "'self' http://localhost:4500",
},

'simple-auth-token': {
  serverTokenEndpoint: 'http://localhost:4500/get-token',
},

'simple-auth': {
  authorizer: 'simple-auth-authorizer:token'
}
Great, now we'll setup s as a protected route and handle authentication in the application route.
// s (secure) route

import Ember from 'ember'
import AuthenticatedRouteMixin from 'simple-auth/mixins/authenticated-route-mixin'

export default Ember.Route.extend(AuthenticatedRouteMixin, {})
Note: I had to manually create an application.js file in app/routes
// application route

import Ember from 'ember'
import ApplicationRouteMixin from 'simple-auth/mixins/application-route-mixin'

export default Ember.Route.extend(ApplicationRouteMixin, {
  actions: {
    sessionRequiresAuthentication: function () {
      this.get('session')
        .authenticate('simple-auth-authenticator:jwt', { password: '' })
        .then(
          function () {
            console.log('custom token authentication successful!')
          },
          function (error) {
            console.log('custom token authentication failed!', error)
          }
        )
    },
  },
})
Assuming that both ember s and node server are running, you should now be able to log in and out of your Ember application and only access /s/ routes when logged in. At this point there is still no real security. Anonymous users are handed tokens willy-nilly, but it's a good start.
Step 4: Setting up Google Account logins
It may be tempting at this point to use a the Google oAuth2 Torii provider bundled into the Ember Simple Auth Torii extension, and simply authenticate with Google and right before authenticating w/ our node server. The problem is that upon authentication, Ember Simple Auth lets the user access secure routes. In other words, /s/notes can be transitioned to before the second authentication with our node server happens and an authorizer is actually set up. I imagine there is a workaround to this problem but I found it simpler to just use Torri providers directly w/out the authenticator wrapper.
ember install toriiYou can setup the Google oAuth2 Bearer provider by adding a torii property to ENV in environment.js.
torii: {
      providers: {
        'google-oauth2-bearer': {
          apiKey: '10514958320583-as0utyahvaekgprntiashtoasht.apps.googleusercontent.com',
          redirectUri: 'http://localhost:4200',
        },
      }
    }
To get an apiKey, go to the Google Developer Console and create a new project. Click on Credentials under APIs & auth in the left side nav and select Create new Client ID under OAuth, choosing Web Application in the popup. (You may need to Configure the consent screen first--just enter the Product Name and click Save). Now, in the popup, enter http://localhost:4200 in both fields (authorized javascript origins and authorized redirect uri). The first requires an actual domain and the second doesn’t need to redirect to any particular Ember route since Ember will handle this on it’s own. Copy the Client ID string, and paste it into environment.js as (you guessed it) the apiKey. At this point, we just need to set up the Application route to log in with Google first and then send the Google token to the node server for custom authentication. Making a few minor edits to sessionRequiresAuthentication:
sessionRequiresAuthentication: function() {
    var session = this.get('session');
    this.get('torii')
        .open('google-oauth2-bearer')
        .then(function(googleAuth){
            var googleToken = googleAuth.authorizationToken.access_token;
            console.log('Google authentication successful.');

            session
                .authenticate('simple-auth-authenticator:jwt', { password: googleToken} )
                .then(function(){
                    console.log('custom token authentication successful!');
                }, function (error) {
                    console.log('custom token authentication failed!', error.message);
                });

        }, function (error) {
            console.error('Google auth failed: ', error.message);
        });
}
Notice how I pass googleToken to the node server as a password. Now, we just need to set up the node server to parse this token, fetch the current user from Google, and return an user-identifying token that can be used for authorizing secure resources. If everything is working, when you click on Login you should see a Request for Permission popup from Google.

Step 5: Fetching user info from Google
In server.js, instead of just returning a token, we must first validate the Google token against Google's API. In this process, Google will send back a unique user id and an email address. We can also call the Google+ People API to get additional data, such as the displayName and image. All of this information can then be used to create/update/find the current user in our backend database and return a unique token, which contains a valid user id, to Ember. The {password: googleToken} object is passed to the server as JSON in the body of the POST request. To get it, we'll need to install the body-parser middleware. We'll also install the request library to make a server-side request to Google.
cd ../node-server
npm install body-parser --save
npm install request --save
and then at the top of server.js:
// decodes json in the body of a request and stores it as req.body
var bodyParser = require('body-parser')

// simple HTTP request client
var request = require('request')
The next step is simply expanding app.post('/get-token') to validate the token.
// secret used to construct json web token
app.secret = '09htfahpkc0qyw4ukrtag0gy20ktarpkcasht'

// send token to user that contains their id
app.sendToken = function (res, userId) {
  var token = createJWT.sign(
    // payload
    { userId: userId },
    // secret
    app.secret,
    // options
    { expiresInMinutes: 10 }
  )
  res.send({ token: token })
  console.log('\tsent token')
}

// respond w/ token to POST request to /get-token
app.post('/get-token', bodyParser.json(), function (req, res) {
  // get Google token from Ember: { password: googleToken }
  var googleToken = req.body.password

  // send token to Google for validation
  request(
    'https://www.googleapis.com/oauth2/v1/tokeninfo?access_token=' +
      googleToken,
    function (error, response, body) {
      if (!error && response.statusCode == 200) {
        console.log('\tGoogle Token Valid')
        var userId = JSON.parse(body).user_id
        var userEmail = JSON.parse(body).email
        app.sendToken(res, userId)
      } else {
        console.log('\tFailed to validate Google Token')
        res.send({})
      }
    }
  )
})
Here, I created a new app.sendToken function for token creation. The created token now contains the Google id, so the node server will always know which Google user it's getting requests from. A more typical setup would be to exchange the Google id and email for whatever the associated user id is in your backend, and then use this id in the token, but I thought I'd keep things as simple as possible.
Step 6: Refreshing the token
Our token expires in 10 minutes, so user's will have to log in w/ Google every 10 minutes. That's no good! We're going to create a refresh token endpoint at localhost:4500/refresh-token that will get used 1 minute before the token expires. Just update simple-auth-token in environment.js.
'simple-auth-token': {
  // get token
  serverTokenEndpoint: 'http://localhost:4500/get-token',
  // refresh token
  serverTokenRefreshEndpoint: 'http://localhost:4500/refresh-token',
  // timeFactor * refreshLeeway = milliseconds before token refresh
  timeFactor: 1000,
  refreshLeeway: 60, // 1 minute
},
Then we'll create that endpoint in server.js. Here, we'll parse the token, get the userId, and then send back a new token with the same userId.
// Refresh token
app.post('/refresh-token', bodyParser.json(), function (req, res) {
// verify token and extract contents (including userId)
var oldToken = req.body.token
createJWT.verify(oldToken, app.secret, function (err, decodedToken) {
if (!err) {
// send new token
console.log('\tRefreshing token for user ', decodedToken.userId)
app.sendToken(res, decodedToken.userId)
} else {
// send error
console.log('\tError while trying to refresh token:', err)
res.send({})
}
})
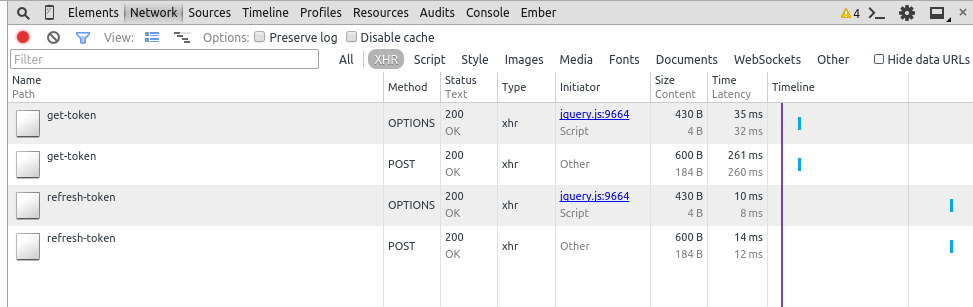
})Just for testing, modify { expiresInMinutes: 10 } in app.sendToken so tokens expire every 2 minutes. This way you should see a token refresh every minute in your node server terminal and in the Network tab of the Chrome console on localhost:4200 once you're logged in. [
Congrats! If you've gotten this far you're good to go! The next step is authorizing resources, which is pretty straightforward. Set up a model in Ember and then handle it's request like so:
// User requests list of notes
app.get('/notes', validateJWT({secret: app.secret}), function(req, res) {

    // get userId from token
    var userId = req.user.userId;

    // lookup notes for user...
    var notes = {
        'id': 1
        'content': 'A note for user '+ userId,
        'user': userId
    };

    // send notes to Ember
    res.send({ notes: notes });
});
Here, validateJWT (actually the express-jwt library), automatically parses the token and provides req.user. This is handy for quickly getting the userId in each request from Ember to serve up the appropriate resources. In the above example, I return some JSON to Ember w/ notes as the top-level element. This is currently how Ember Data likes to receive data, but is changing with version 1.13 and the introduction of JSON API.
Hey, this is my first Ember tutorial and I'd appreciate your feedback! Authentication & Authorization can be tricky to get right, and I hope this pattern helps you get a better feel for things. If you run into issues, please consult my git repo github.com/micahjon/basic-auth-demo or leave a comment. Special thanks to Martin Genev whose post on 100PercentJS got me started.
While you're here, check out my latest project: a podcast app that skips ads!
Comments are welcome!